


Bird Photography 101
Taking pictures of birds is a profoundly rewarding experience, but getting that perfectly tack sharp shot can be very challenging.
In this article, I want to explain how to get into bird photography and how to get sharp shots of birds.
We’ll also cover equipment, camera settings, and photographing birds in challenging situations.
Let’s get into it.
Understanding Birds

Before diving into the gear, and technical aspects of bird photography, I suggest familiarizing yourself with your subjects — the birds.
It pays to invest some time into understanding their behavior, habitats, and preferences.
Species Identification:
Get a field guide, check out The Cornell Lab’s All About Birds, and download the Merlin app.
These resources will help you identify and learn about birds in a fun and engaging way (especially the Merlin app which lets you hold up your phone and identify a bird by sound).
Behavior and Habits:
Acquaint yourself with the behaviors, feeding, and mating habits of the birds you wish to photograph.
Knowing when birds are most active and where they are hanging out at different times of year will enhance the quality and variety of your shots.
Essential Equipment for Bird Photography

Unfortunately, taking pictures of wild birds requires buying some pricey equipment.
Thankfully, recent advances in technology have made telephoto lenses and mirrorless cameras more affordable and accessible, but bird photography is not cheap.
At a minimum, you need 1) a camera and 2) a lens.
The camera can be either a DSLR or a mirrorless system, but I highly recommend getting a mirrorless camera as soon as possible.
In general, mirrorless cameras outperform DSLRs when it comes to ISO performance, frames per second, and ability to track a subject.
I upgraded from a DSLR to a Canon EOS R7 not long ago because of its impressive frames per second in electronic mode (30 FPS), along with having an APSC sensor (giving me a crop factor of 1.6X), eye tracking, and in-body stabilization for a relatively affordable price.
But, the Canon R7, along with other “budget friendly” mirrorless cameras, is not perfect.
Shutter shock in mechanical shutter mode and rolling shutter in electronic shutter mode can ruin a good shot.
Camera manufacturers will solve these issues eventually, but for now, we must live with these challenges.
In general, the more expensive your camera, the less these issues will affect you because top of the line cameras have faster readout speeds or stacked sensors.
But, even with these challenges, cameras like the Canon EOS R7 are more fun to use and better at getting sharp shots of birds than a DSLR (at least in my experience).
If you are not ready to move on from DSLRs, you can get great deals on used ones that take incredible photos.
The Nikon D500 and the Canon 7D Mark II are still excellent cameras for bird photography, they just lack the impressive eye tracking and ISO performance of mirrorless cameras.
When selecting a lens for photographing wild birds, the advice I often hear is to spend more money on the lens than on the camera body. That’s easy to do as most quality lenses are shockingly expensive. But, I didn’t go that route, at least not yet.
Right now I’m using the well-rated Canon RF 400mm on my R7 (1.6X crop), giving me an effective focal length of 640mm, which is perfect for photographing even smaller birds.
In general, if you have an camera with an APSC sensor, like the Canon R7, I would stick with lenses ranging from 200mm-600mm.
For full frame cameras, like the Canon R8, I would shoot for 300mm-600mm focal lengths.
Another thing to keep in mind is that, in general, prime lenses (with fixed focal lengths) produce sharper images, but zoom lenses provide more flexibility, often allowing you to whip around and get a shot that the prime lenses is simply not build for (think tracking small birds in flight).
Other Helpful Bird Photography Gear
Tripods & Monopods:
A sturdy tripod or monopod helps eliminate camera shake when using long lenses.
If you enjoy using prime lenses, a good tripod is often more helpful than a monopod, but at the cost of portability.
But, for me, handholding my camera and lens is my favorite way to photograph birds so the tripod and monopod are often left at home or in the car.
So, before investing in an expensive tripod or monopod, consider if it fits your style of bird photography.
Camera Bag:
A durable, weather-resistant bag is incredibly important. Not only will it help protect your gear from a light rain or mist, but makes carrying your gear more comfortable, especially those huge lenses. Don’t skimp on getting a good bag.
Storage:
Fast SD and compact flash cards, as well as a quality portable hard drive are essential for storing your images.
A Fast SD, or compact flash, card actually allows your camera’s buffer to clear faster, letting you get a few more shots when holding the shutter button down.
And, a quality portable hard drive helps prevent the painful experience of losing all your images to an error or malfunction (which happens far too often with cheaper models).
Being thrifty is good, but I suggest not picking the cheapest options in this category because losing prized images is one of the most frustrating things that can happen.
The Best Camera and Lenses for Bird Photography
Based on my research and experience, these are some of the best cameras and lenses for bird photography.
Because I’m currently a Canon user I’ve included more Canon cameras and lenses, but Nikon and Sony make great cameras and lenses too, I’m just not as familiar with their lineup.
Ok, here’s the list:
Cameras
- Canon EOS R7: Mirrorless 32.5 MP CMOS (Cropped 1.6X) Sensor; 30 FPS in Electronic Shutter Mode
- Canon EOS R5: Mirrorless 45 MP CMOS (Full-Frame) Sensor; 20 FPS in Electronic Shutter Mode
- Canon R6 Mark II: 24.2 MP CMOS (Full-Frame) Sensor; 40 FPS in Electronic Shutter Mode
- Sony Alpha 1: 50 MP CMOS (Full-Frame) Sensor; 30 FPS in Electronic Shutter Mode
- Nikon Z8: 45.7 MP Stacked CMOS (Full-Frame) Sensor; Only has Electronic shutter, 20 FPS shooting RAW and 30 FPS shooting JPEG
- Nikon Z9: 45.7 MP Stacked CMOS (Full-Frame) Sensor; Only has Electronic shutter, 20 FPS shooting RAW and 30 FPS shooting JPEG
Lenses
- Canon RF 100-400mm f/5.6-8 IS USM
- Canon RF 600mm f/11 IS STM
- Canon RF 800mm f/11 IS STM
- Canon RF 100-500mm f/4.5-7.1 L IS USM
- Sony FE 200-600mm f/5.6-6.3 G OSS
- Nikon Nikkor Z 100-400mm f/4.5-5.6 VR S
- Nikon Nikkor Z 180-600mm f/5.6-6.3 VR
Camera Settings for Bird Photography
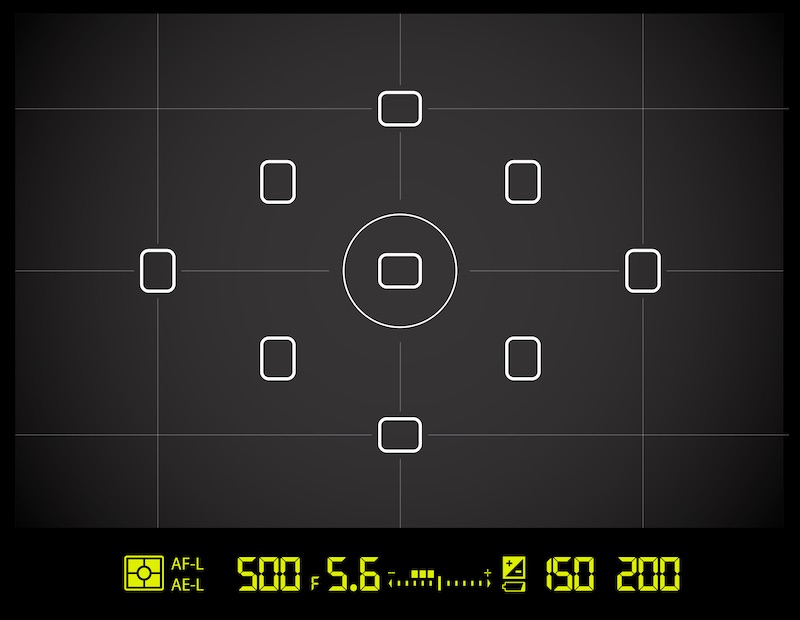
Selecting the best setting for bird photography can often be the difference between getting fuzzy shots and sharp shots.
While the best settings for photographing birds varies slightly between cameras, the general idea is to set up your camera to quickly focus on the subject, track its movement and/or eye, and capture the image with sufficient light to avoid excessive noise.
The Exposure Triangle for Birds:
Shutter Speed:
Using a fast shutter speed is critical to getting sharp shots.
Far too often I’ve set my shutter speed to 1/500 only to discover later that some of my best action shots, like birds taking off, are blurry.
I highly recommend using a shutter speed of 1/1000 or more, just so you don’t miss a shot.
Aperture:
A wide aperture (lower f-number) allows more light in and provides a beautiful bokeh effect, isolating the bird from the background.
But, in my experience, a wider aperture produces fewer sharp images than lower f-stops (f/8, f/11).
Yes, if you have a 500mm or 600mm prime lens at f/4, you can get sharp images that look incredible, but even those lenses get sharper at lower f-stops.
For those of us that use zoom lenses (like the Canon RF 100-400mm), aiming for an f-stop of f/8 or f/11 will get you the sharpest images.
ISO:
The typical advice is “keep the ISO as low as possible to reduce noise.”
But, that advice fails at helping beginner bird photographers get sharp images.
The reality is that shutter speed is often the main factor standing between a sharp image and a blurry image, and ISO often needs to be pushed relatively high to achieve appropriate shutter speeds, especially if your aperture is at f/8.
Thankfully, modern mirrorless cameras, like the Canon EOS R7, can be pushed to 1600 or even 3200 without ruining the photo with excess noise.
And, post processing software, like Adobe Lightroom, have excellent noise removal, saving pictures that would otherwise look ridiculously grainy.
So, if you have a mirrorless camera, try increasing your ISO and see if your images look sharper.
Canon EOS R7 Settings for Bird Photography
Finding the camera settings that are right for you is often a matter of experimentation, but thankfully there are lots of bird photographers willing to share what’s working for them. I highly recommend searching YouTube for bird photography settings for your specific camera. But, if you have a Canon R7, then check out the settings listed below (these are what I use).
The best way to use this list of settings is to go menu by menu, and number by number. Press the “Menu” botton on the R7 and start with the leftmost menu (each menu has a color and symbol):
Red Menu (Camera Icon)

1:
- Image quality: CRAW
- Dual Pixel RAW: Disable
- Still img aspect ratio: 3:2
2:
- Expo.comp./AEB: 0
- ISO speed settings: no changes
- HDE shooting HDR PQ: OFF
- HDR Mode: OFF
- Auto Lighting Optimizer: OFF
- Highlight tone priority: OFF
- Anti-flicker shoot.: Flicker!OFF
3:
No changes
4:
- White balance: Auto (K5400 and K6100 are good options if you prefer not have the camera choose)
- Custom White Balance: no changes
- WB Shift/Bkt.: 0,0/+-0
- Color space: Adobe RGB
- Picture Style: Standard
- Clarity: 0
- Shooting creative filters: OFF
5:
- Lens aberration correction: no changes
- Long exp. Noise reduction: OFF
- High ISO speed NR: OFF
- Dust Delete Data: no changes
6:
- Multiple exposure: Disable
- RAW burst mode: Disable
- Focus bracketing: Disable
7: (important menu)
- Drive mode: choose H+ (30 frames a second) or H (15 frames a second) depending on shutter mode.
- Interval timer: Disable
- Bulb timer: Disable
- Silent shutter function: OFF
- Shutter mode: Elec. 1st-curtain (up to 15 FPS) or Electronic (shoots up to 30 FPS but suffers from some rolling shutter) (avoid Mechanical due to shutter shock)
- Release shutter without card: OFF
8:
- IS (Image Stabilization): click in and set “IS mode” to OFF and “Digital IS” to OFF
- Auto level: Disable
- Custom Quick Controls: no changes
- Touch Shutter: Disable
- Image Review: click in and set to Off
- High speed display: ON (important for tracking flying birds; you may need to be in Mechanical shutter mode with the H drive mode to adjust this)
- Metering timer: 8 sec.
9:
- Display simulation: Exp.SIM (you can see your exposures through the viewfinder; click in and select Exposure+DOF)
- OVF sim. View assist: Off
- Shooting info. disp.: no changes
- Reverse display: no changes
- VF display format: no changes
- Disp. performance: click in an set to “Smooth”
10: (movie settings)
No changes
Pink Menu (Auto Focus “AF” Menu)

1:
- AF operation: SERVO
- AF area: AF[2]
- Subject tracking: ON
- Subject to detect: Animals
- Eye detection: Enable (If you use a custom button to toggle eye tracking on and off, like I do, you can Disable it)
- Switching tracked subjects: 0 or 1 (set it to 0 if you don’t want your autofocus to stray to a different subject)
2:
Servo AF: AUTO
3:
- One-Shot AF release prior.: no changes
- Preview AF: Disable
- Lens drive when AF impossible: ON
- AF-assist beam firing: ON
4:
No changes
5:
- MF peaking settins: ON
- Focus guide: ON
- Movie Servo AF: Enable
6:
- Electronic full-time MF: OFF
- Lens electronic MF: OFF
- Focus ring rotation: default setting
- RF lens MF focus ring sensitivity: default setting
Blue Menu (Play button symbol)
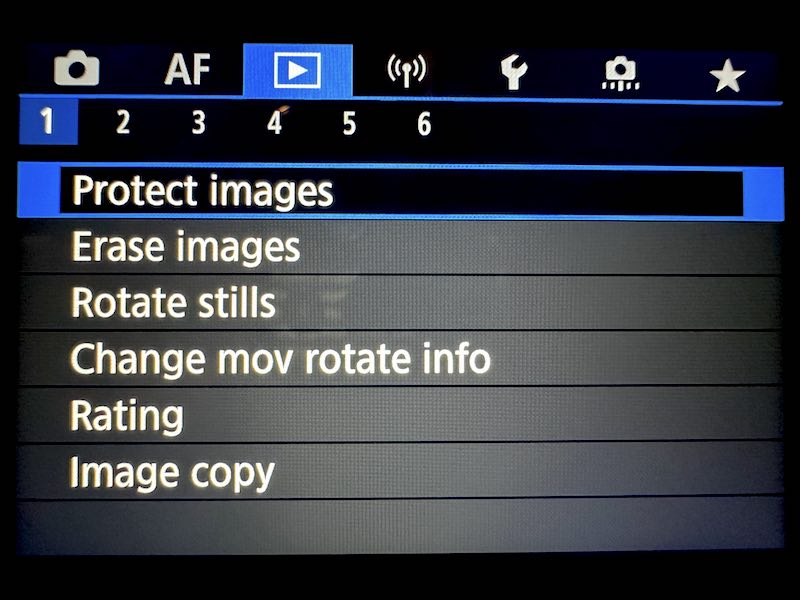
1:
No changes
2:
No changes
3:
No changes
4:
No changes
5:
No changes
6:
- Playback information display: no changes
- Highlight alert: Enable
- AF point disp.: Enable
- Playback grid: Off
- Movie play count: Rec time
- HDMI HDR output: Off
Purple menu (Communications symbol)

No changes
Yellow Menu (Wrench symbol)

1:
- Record func+card/folder sel.: click in and selection “Rec options: Auto switch card” (unless you want to dedicate one card to video)
- File numbering: continuous
- File name: no changes
- Format card (do this for every new SD card you buy)
- Auto rotate: On
- Add rotate info: Disable
- Date/Time/Zone: change as necessary
2:
No changes
3:
- Beep: Enable (enable it if you want to hear a shutter sound in electronic shutter mode)
- Volume (adjust down in most cases)
- Headphones: no changes
- Power saving: no changes
4:
No changes
5:
No changes
6:
No changes (but this is where you can set up custom shooting modes)
Orange menu (Custom function menu; camera icon with a bracket)

1:
- Exposure level increments: 1/3
- ISO speed setting increments: 1/3
- Speed from metering/ISO Auto: Auto
- Bracketing auto cancel: ON
- Bracketing sequence: 0
- Number of bracketed shots: 3
- Safety shift: OFF
2:
- Same expo. For new aperture: ISO (keeps your exposure the same if you lens changes aperture while zooming in and out)
- AE lock meter. Mode after focus: no changes
- Set shutter speed range: no changes
- Set aperture range: no changes
3:
This is where you can customize dials and buttons
For example, I use the Depth of Field preview (DOF) on the front of the camera to toggle eye detection on an off. And, I use the AF-On button on the back of the camera as my auto focus button.
4:
No changes
5:
No changes
Green Menu (star symbol)
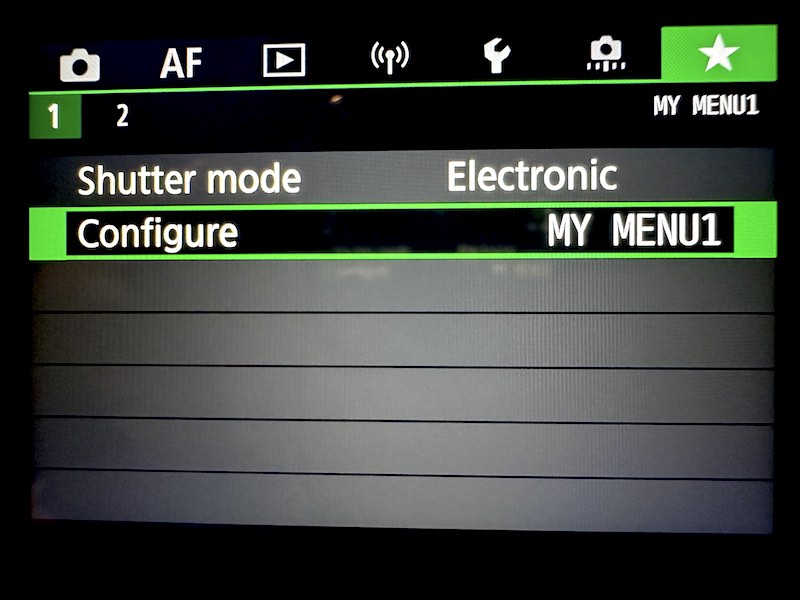
Add settings you would like to find easily.
Practice and Continuous Learning
Go Outdoors: Reading about bird photography is great, but nothing beats taking your camera into the field and taking pictures of birds in action. Experiment with different settings and compositions and adjust in real time as the conditions change (sunny to shady, etc.).
Learning Resources: Consider joining bird photography workshops, online courses, or photography clubs to learn from other bird photographers. You can pick up some great tips for photographing specific types of birds and/or the best places in your area to photograph birds.
Post-Processing Your Images
Editing Software: Adobe Lightroom and Photoshop are powerful tools for editing and enhancing your images. It worth watching a few tutorials so that you can edit your best bird photos.
Editing Techniques: Learning some basic editing techniques such as cropping, exposure adjustment, color correction, and sharpening is an nifty way to level up your photos. Even basic contrast adjustments can make your bird photo look sharper because of how our brains perceive light and color.
Selecting the Ideal Locations and Timing

The environment you choose to shoot in plays a pivotal role in bird photography.
Scouting and selecting prime locations increases the likelihood of encountering a variety of bird species and capturing them in natural, engaging settings.
Bird Hangouts
Natural Habitats: Explore forests, lakes, rivers, and grasslands where birds naturally congregate. National parks and wildlife refuges often offer abundant opportunities.
Urban Areas: Don’t overlook the possibility of capturing birds in urban settings such as city parks or botanical gardens. Zoos also offer fun opportunities for getting up close to exotic birds and practicing with new camera settings and/or lenses.
Time of Day and Seasons
Golden Hours: The hours around sunrise and sunset often provide beautiful lighting. Birds are also generally more active during these times.
Seasonal Migration: Consider the migratory patterns of birds. Certain locations may be abundant with diverse species during migration seasons.
Overcoming Challenges in Bird Photography
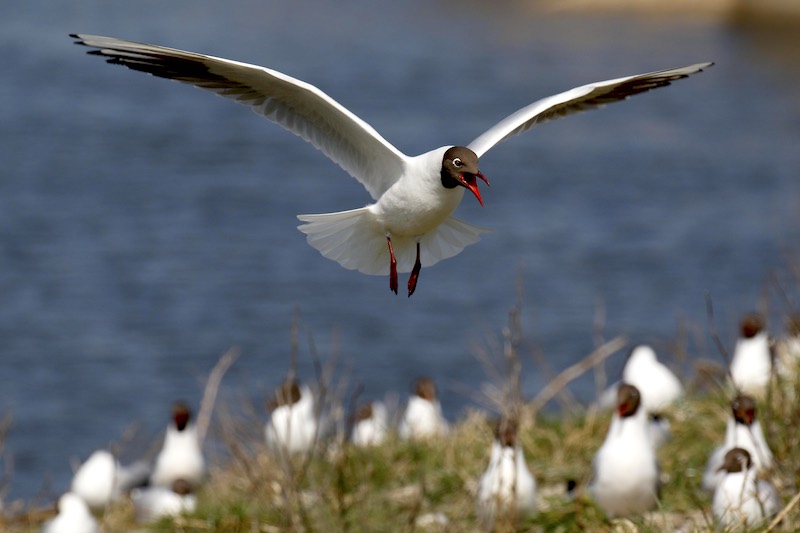
Every photographer faces challenges, and in bird photography, these can be particularly unique due to the unpredictability and quickness of birds.
Lighting Challenges
Harsh Light: Avoid shooting in the middle of the day when the light is harsh. If unavoidable, try to position the bird between you and the sun, or look for shaded areas.
Low Light: In lower light conditions, increase your ISO setting or use a wider aperture to allow more light into the lens. Additionally, use a tripod to manage slower shutter speeds without introducing camera shake.
Focusing Difficulties
Moving Birds: Tracking birds in motion can be challenging. Practice panning techniques and use continuous autofocus modes to maintain focus on the birds as they move.
Cluttered Backgrounds: Autofocus systems may struggle with cluttered backgrounds. In such cases, manually focus the lens or adjust the focus points to concentrate on the bird.
Weather Conditions
Weather plays a significant role in outdoor photography, presenting both challenges and opportunities.
Rain: Overcast and rainy days can offer diffused lighting and opportunities for unique shots. But, be careful that you don’t get caught in a downpour. Protect your gear with weather-sealed covers and/or a camera bag.
Wind: Windy conditions can make it challenging to keep your camera stable and capture sharp images. Use a sturdy tripod and increase your shutter speed to minimize the impact of wind. And, especially if you are handholding your camera, increase your shutter speed.
Birds in Flight
A bird in flight is typically much harder to photograph than a bird perched on a branch, or rock.
But, getting a sharp shot of a bird, wings spread out, is very rewarding.
First, practice taking pictures of a bigger bird, like a Seagull or Pelican, which tend to soar more, allowing you to get a few shots off before they land or get too far away.
Second, use fast shutter speeds (1/1000-1/2000 or even faster) to freeze the motion and capture sharp images of birds in flight.
Finally, once you get the bird in focus, hold down that shutter button and take as many shots as you can. Sometimes the best technique for a bird in flight, especially a fast one, is spray and pray.
Tips for Better Bird Photos
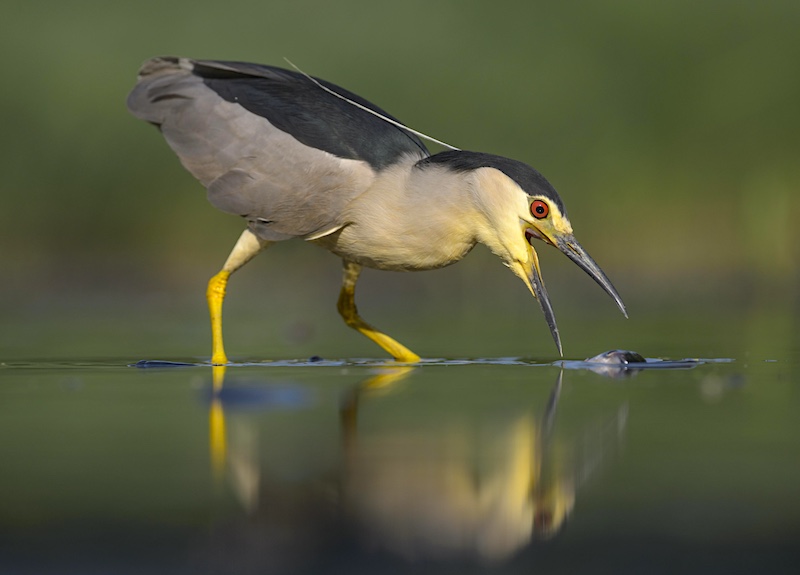
Once you are comfortable with your camera, and have some familiarity with the settings, it’s time to think about composition. Getting a sharp shot of a bird is one thing, getting an interesting image of a bird that captures a story will take your photos to the next level.
Here’s how to make your bird photos pop:
Focus on the Eyes: Ensure that the eye (or eyes) of the bird are in sharp focus. Humans are drawn to the eyes of whatever we are looking at, so it’s critical that the eye of the bird be sharp in your shots because it’s the first thing that will be noticed. If the eye is sharp, the entire photo feels sharp, even when it’s not. Many modern mirrorless camera have “eye tracking,” which works amazingly well, so use it and your shots should improve significantly.
Background: Look for simple, uncluttered backgrounds that don’t distract from the bird. Utilize wide apertures to create a pleasing blur. Post-processing can help remove non-ideal branches and other things that may be distracting in your photos, but picking a background from the start without distracting elements is best.
Continuous Focus: Use continuous autofocus modes to maintain focus on the moving bird. Learning to effectively track the bird with your camera is essential.
Anticipate Movements: Learn about bird behavior to anticipate actions, such as taking off, landing, or feeding. Being prepared helps in capturing dynamic shots.
Capture Interactions: Photographing birds interacting with each other, their environment, or other species will instantly make your photos more interesting. These kinds of photos often tell a story, which makes them far more interesting to look at than images with no details or context. In some cases, you may want to zoom out from your subject to capture the environment that the bird is living in instead of filling the entire frame with the bird.
Developing Your Unique Style
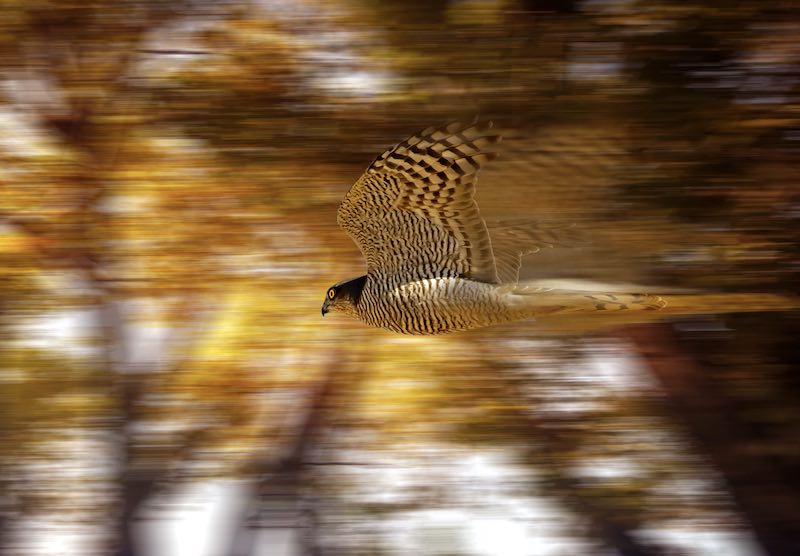
As you delve deeper into bird photography, you’ll want to cultivate a personal style that resonates with your vision and interpretation of the beauty of birds and their habitats.
Don’t be afraid to try different styles and techniques. From close-up portraits to focusing only on a certain aspect, like a bird’s feet, try different angles.
Explore various post-processing techniques to convey moods, highlight details, or create artistic interpretations of your shots. A simple change like going from color to black and white changes how it feels aesthetically.
Sharing and Community Engagement
Sharing your work and engaging with a community of like-minded birders can be immensely rewarding and educational.
Social Media: Platforms such as Instagram or Facebook allow you to showcase your work, connect with fellow bird photographers, and receive constructive feedback.
Birding & Photography Clubs: Participate in a local birdwatching and/or photography clubs. These are great places to make friends and learn about local birds and photography gear.
Patience and Respect
Patience is key in bird photography. Spending time observing, waiting, and adapting to the birds and their environment is paramount.
Always maintain a respectful distance, prioritizing the welfare and natural behavior of the birds above the photographic outcome.
Avoid being a paparazzi of bird photography, the goal is to enjoy nature through observing birds rather than chasing them down and making them feel nervous.
Joining Conservation Efforts
As a bird photographer, you have unique skills can help bird conservation efforts.
Educational Value: Use your photographs to educate and create awareness about bird species and their conservation needs.
Supporting Organizations: Consider supporting and collaborating with bird conservation organizations. Your images can be powerful tools for communication and fundraising.
Conclusion
Bird photography is such a fun hobby and a great excuse to get outside and into nature.
I hope this article provided some helpful information about getting started and how to improve your bird images.
If you have any questions or insights to share about photographing these amazing creatures, don’t hesitate to reach out.
As always, keep birding.